|
<< Click to Display Table of Contents >> Advanced Emailer - Email - Home Page |
  
|
|
<< Click to Display Table of Contents >> Advanced Emailer - Email - Home Page |
|
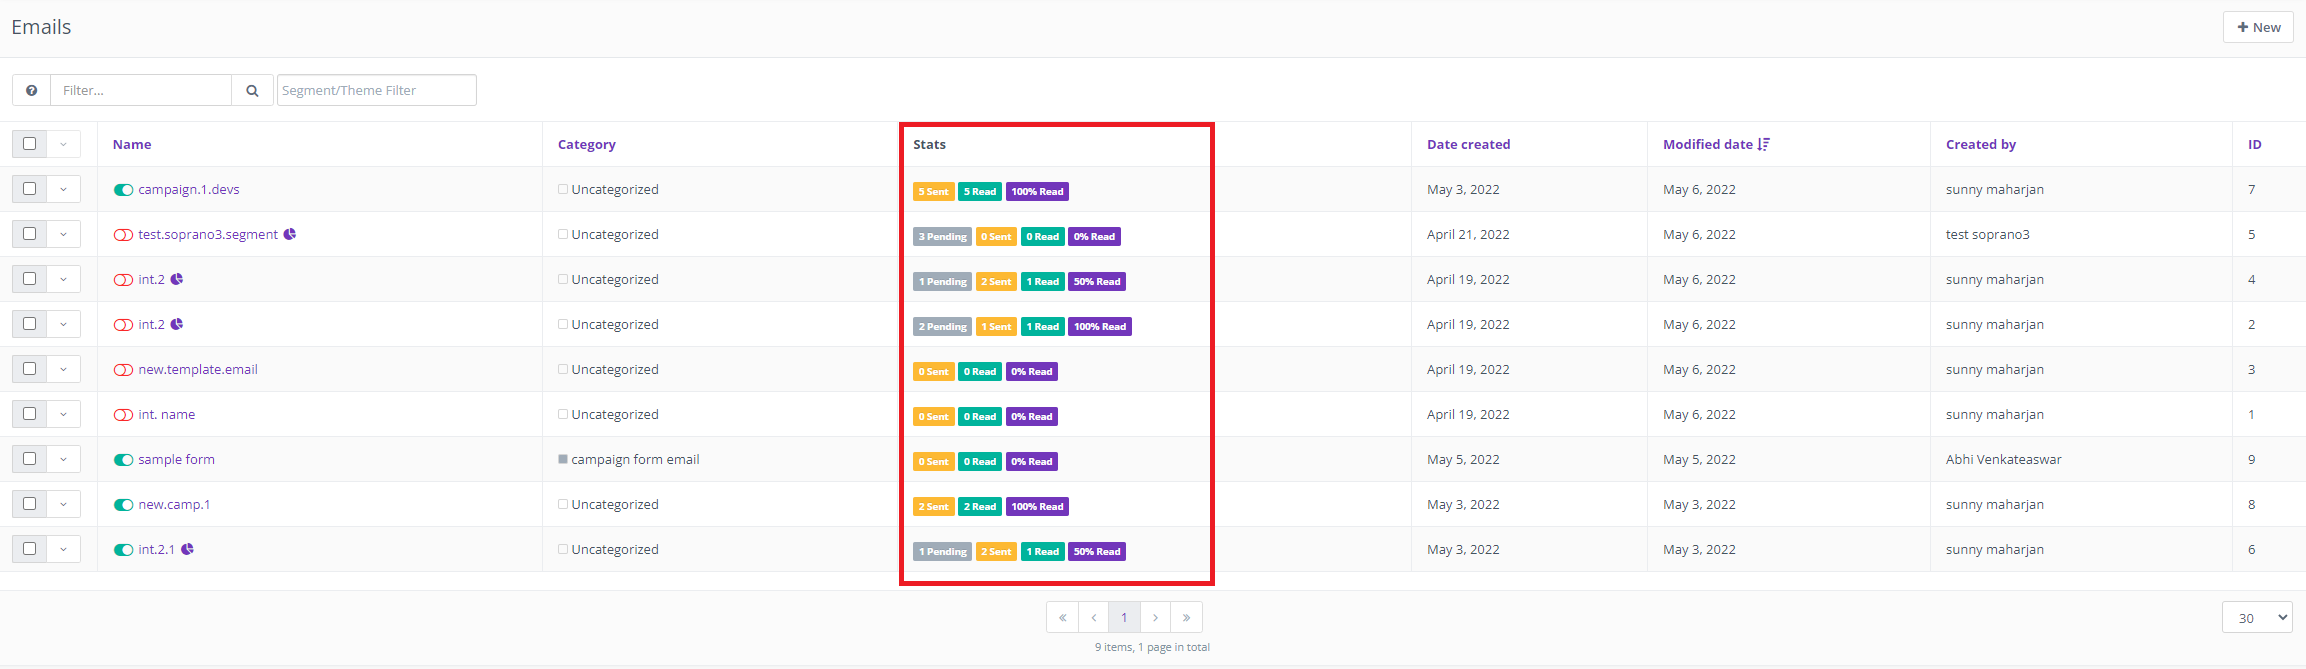
Email Overview
The email overview allows at-a-glance information regarding the success or failure of a particular email. You can quickly see relevant information in regards to opens, bounces, successful click-throughs and other important statistics.
Email Creation
Email creation can be handled through the graphical email builder with little to no HTML knowledge. Emails are assigned to particular segments and/or campaigns. Below are some key steps to be performed when creating an email.
Translations
When creating the email, an option is given to assign a language and a translation parent. By selecting a translation parent, the current item is then considered to be a translation in the selected language of that parent item. If a contact has a preferred language set, they will receive the translated version in their preferred language if it exists. Otherwise, they will receive the parent in the default language.
Segments
When creating an email Users can select the segments to which the emails are to be sent.
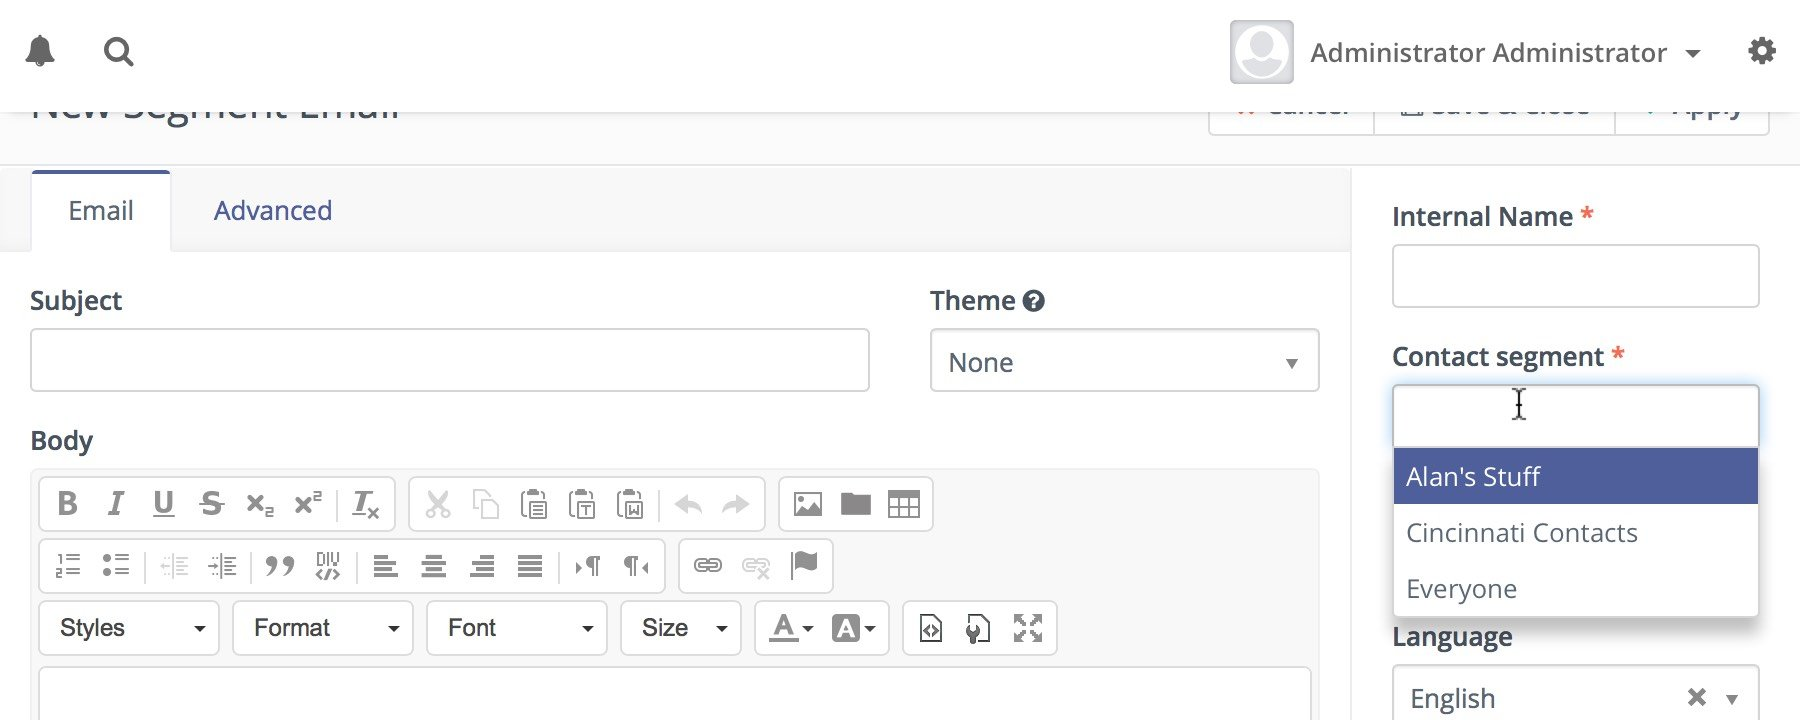
This entry field is a multi-select which allows Users to choose several segments if necessary.
Email Builder
The email builder is a graphical user interface to create an HTML email through the use of drag-and-drop tools.
The builder will let Users drag the predefined content sections from the right hand toolbar and drop them to the position of choice. It is possible to select from layout of 1, 2 or 3 columns. The existing sections can be re-ordered or removed.
The email builder provides quick and convenient access to assets, landing pages, and other extra fields which are considered important or commonly used. All of these are accessible via tokens in format {component=item}, for example {contactfield=company}. A drop-down with options will appear when Users type the { character and enables Users to search for the right token by typing its name. For example, if Users type {comp, it will suggest the right token for the Company Contact Field and can be selected via keyboard or by clicking on it.
Tokens can also be used for the Subject line, but there is no drop-down. Users will have to type it or select it in the email body and copy-paste into the subject field.
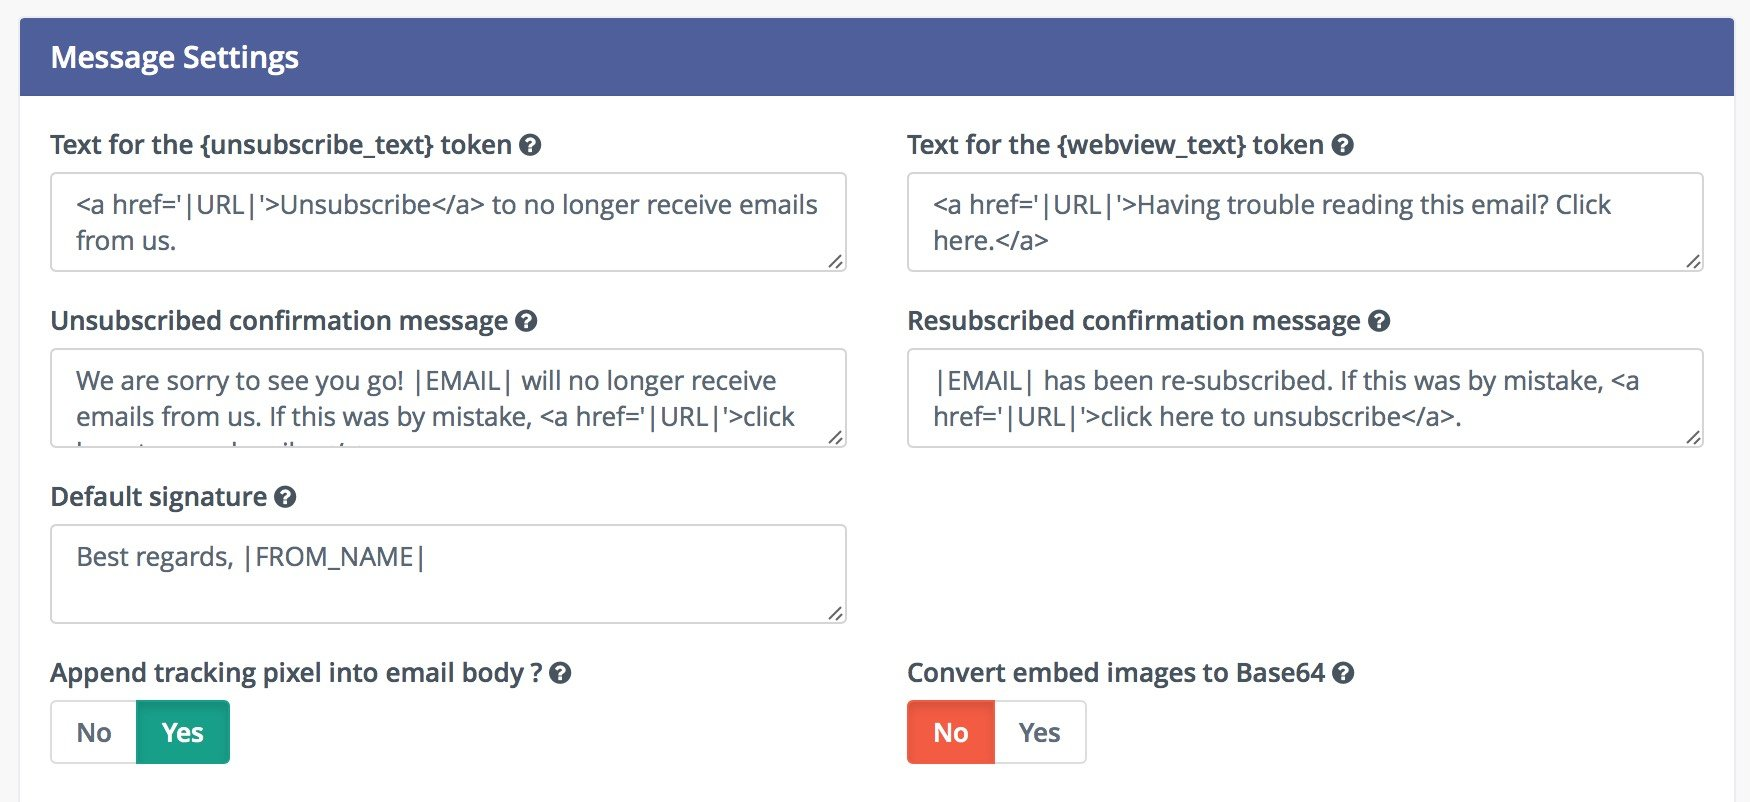
Email Builder has also special tokens for the Unsubscribe link, Webview link and the Tracking pixel:
{unsubscribe_text} - Creates a link with the unsubscribed URL and the text defined in the Mautic configuration.
{unsubscribe_url} - Creates a URL to the unsubscribed page which can be used in a link's href attribute.
{webview_text} - Creates a link with the webview URL and the text defined in the Mautic configuration.
{webview_url} - Creates a URL to the webview page which can be used in a link's href attribute.
{tracking_pixel} - Creates a 1 pixel image that allows to track email open.
Default value
A token can have a default value for situations when the contact doesn't have a known value. The default value can be specified after | character. For Example : {contactfield=company|Default text}.
Encoded value
Embed the tokens as {contactfield=FIELDALIAS|true}. The |true tells Advanced Emailer to encode the value used for example in urls.
Date format
For custom date fields use:
{contactfield=DATEFIELDALIAS|datetime}
{contactfield=DATEFIELDALIAS|date}
{contactfield=DATEFIELDALIAS|time}
User date will displayed in human-readable format taken from Configuration > System Settings.
Default format for date only
Default Time Only Format
Tracking Pixel
The tracking pixel image is usually appended to the email message, if enabled. If required, Users could insert the tracking pixel image with the special token {tracking_pixel} at any place other within the text body. Note that it should not be inserted directly after the opening <body> because this prevents correct display of pre-header text on some MUAs.
Code Mode
Go to the Code Mode section to learn more about editing emails in code mode.
Base64 Encoded Images
Users can let Mautic encode all images in the email text as base64. It will attach the image inside the email body. It has several implications:
•The main idea with this option is that most of the email clients will display the images directly without any approvals.
•However, some email clients like Gmail will require the approval because of the tracking pixel and won't display the base64 encoded images.(See Disable the Tracking Pixel below for possible solution)
•The email body will increase significantly if the email contains many and/or large images. Some email clients like Gmail will "clip" such images from the emails and will not be displayed correctly.
Disable the Tracking Pixel
As described above, some email clients display the image approval if one of the images is loaded from a remote location (Like the tracking pixel). If Users care more about this approval than the email open tracking, the Tracking Pixel can be disabled. Then the images should be displayed directly without any approval.