|
<< Click to Display Table of Contents >> Advanced Emailer - Create a New Form - New Campaign Form |
  
|
|
<< Click to Display Table of Contents >> Advanced Emailer - Create a New Form - New Campaign Form |
|
A Campaign Form can push a contact directly into a campaign but all actions are performed in the Campaign Builder.
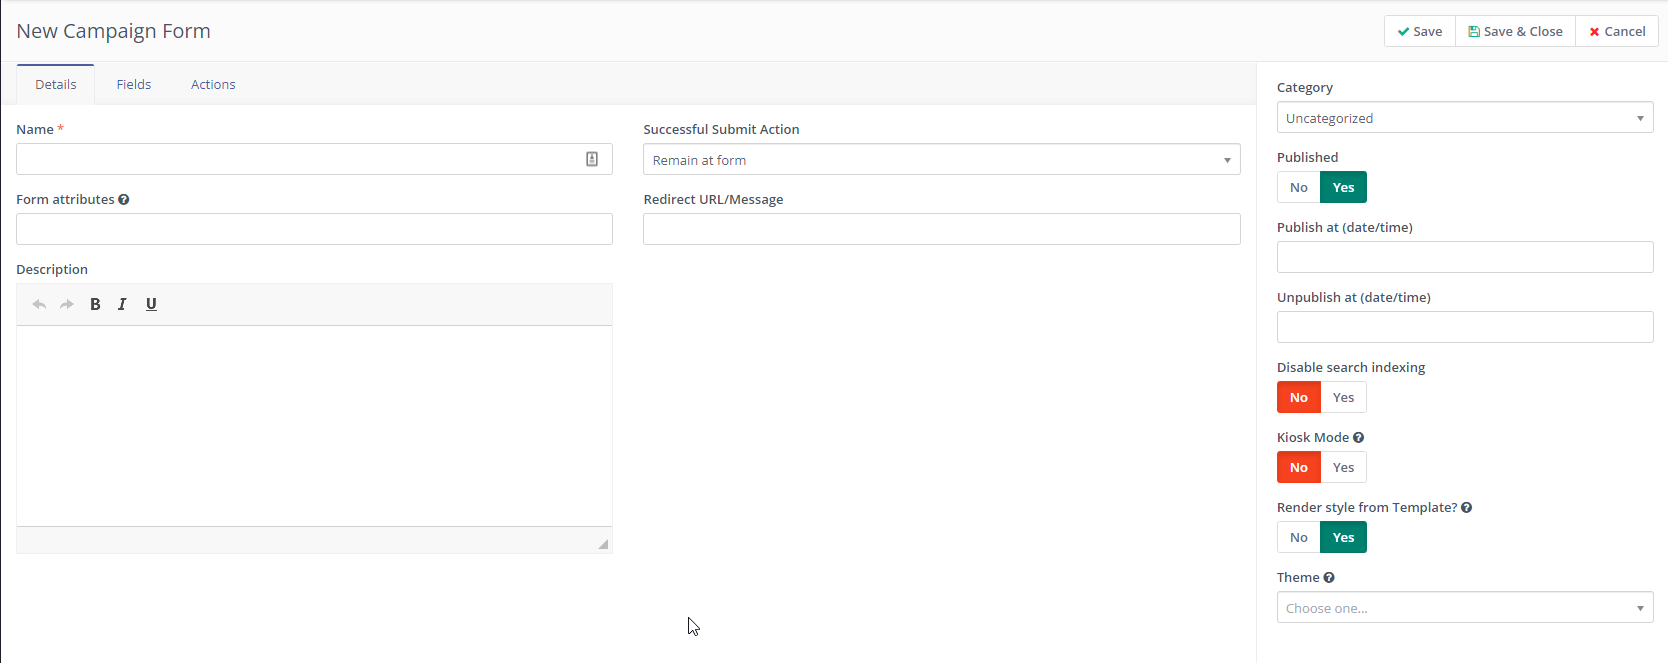
Details Tab
Name
|
Provide a custom name to the Campaign Form |
Successful Submit Action
|
Assign an action to be associated to the submission of the form by the Customer
|
Form attributes
|
Add custom HTML tags to the form as attributes. Some software applications can take advantage of having custom HTLM tags.
For Example ; name="my-form"
|
Redirect URL/Message
|
If the form's action is Redirect URL, Users can add a custom message when Customers are being re-directed.
For Example ; "You are now being redirected to an external URL..."
|
Description
|
Provide a short custom description to the Campaign Form
|

Fields Tab
Add a new field
|
Choose from several types of fields that can be introduced within a Campaign Form
|
Maximum fields displayed at a time
|
When dealing with many fields within a single form, Users have the flexibility to only make a few fields (based on the number specified) visible to Contacts.
|
Custom Submit button
|
The submit button can be customized to User's preferences.
For Example ; It could be re-named to "Send".
|

Users are presented with several actions to choose from. Actions could be "Download and asset", "Send Email to User" etc.
Assuming the example Action chosen is "Send Email to User" the following screen is presented.

Fill in the fields shown above :
Provide a custom Name.
Provide a short Description.
Email to send allows Users to choose existing Email templates or Create new.
Choose the recipient for the Action Email by choosing the User from the Send email to user field.
Choose to either Save, save and close or cancel this action ![]() .
.