|
<< Click to Display Table of Contents >> Creating Interactive Messages |
  
|
|
<< Click to Display Table of Contents >> Creating Interactive Messages |
|
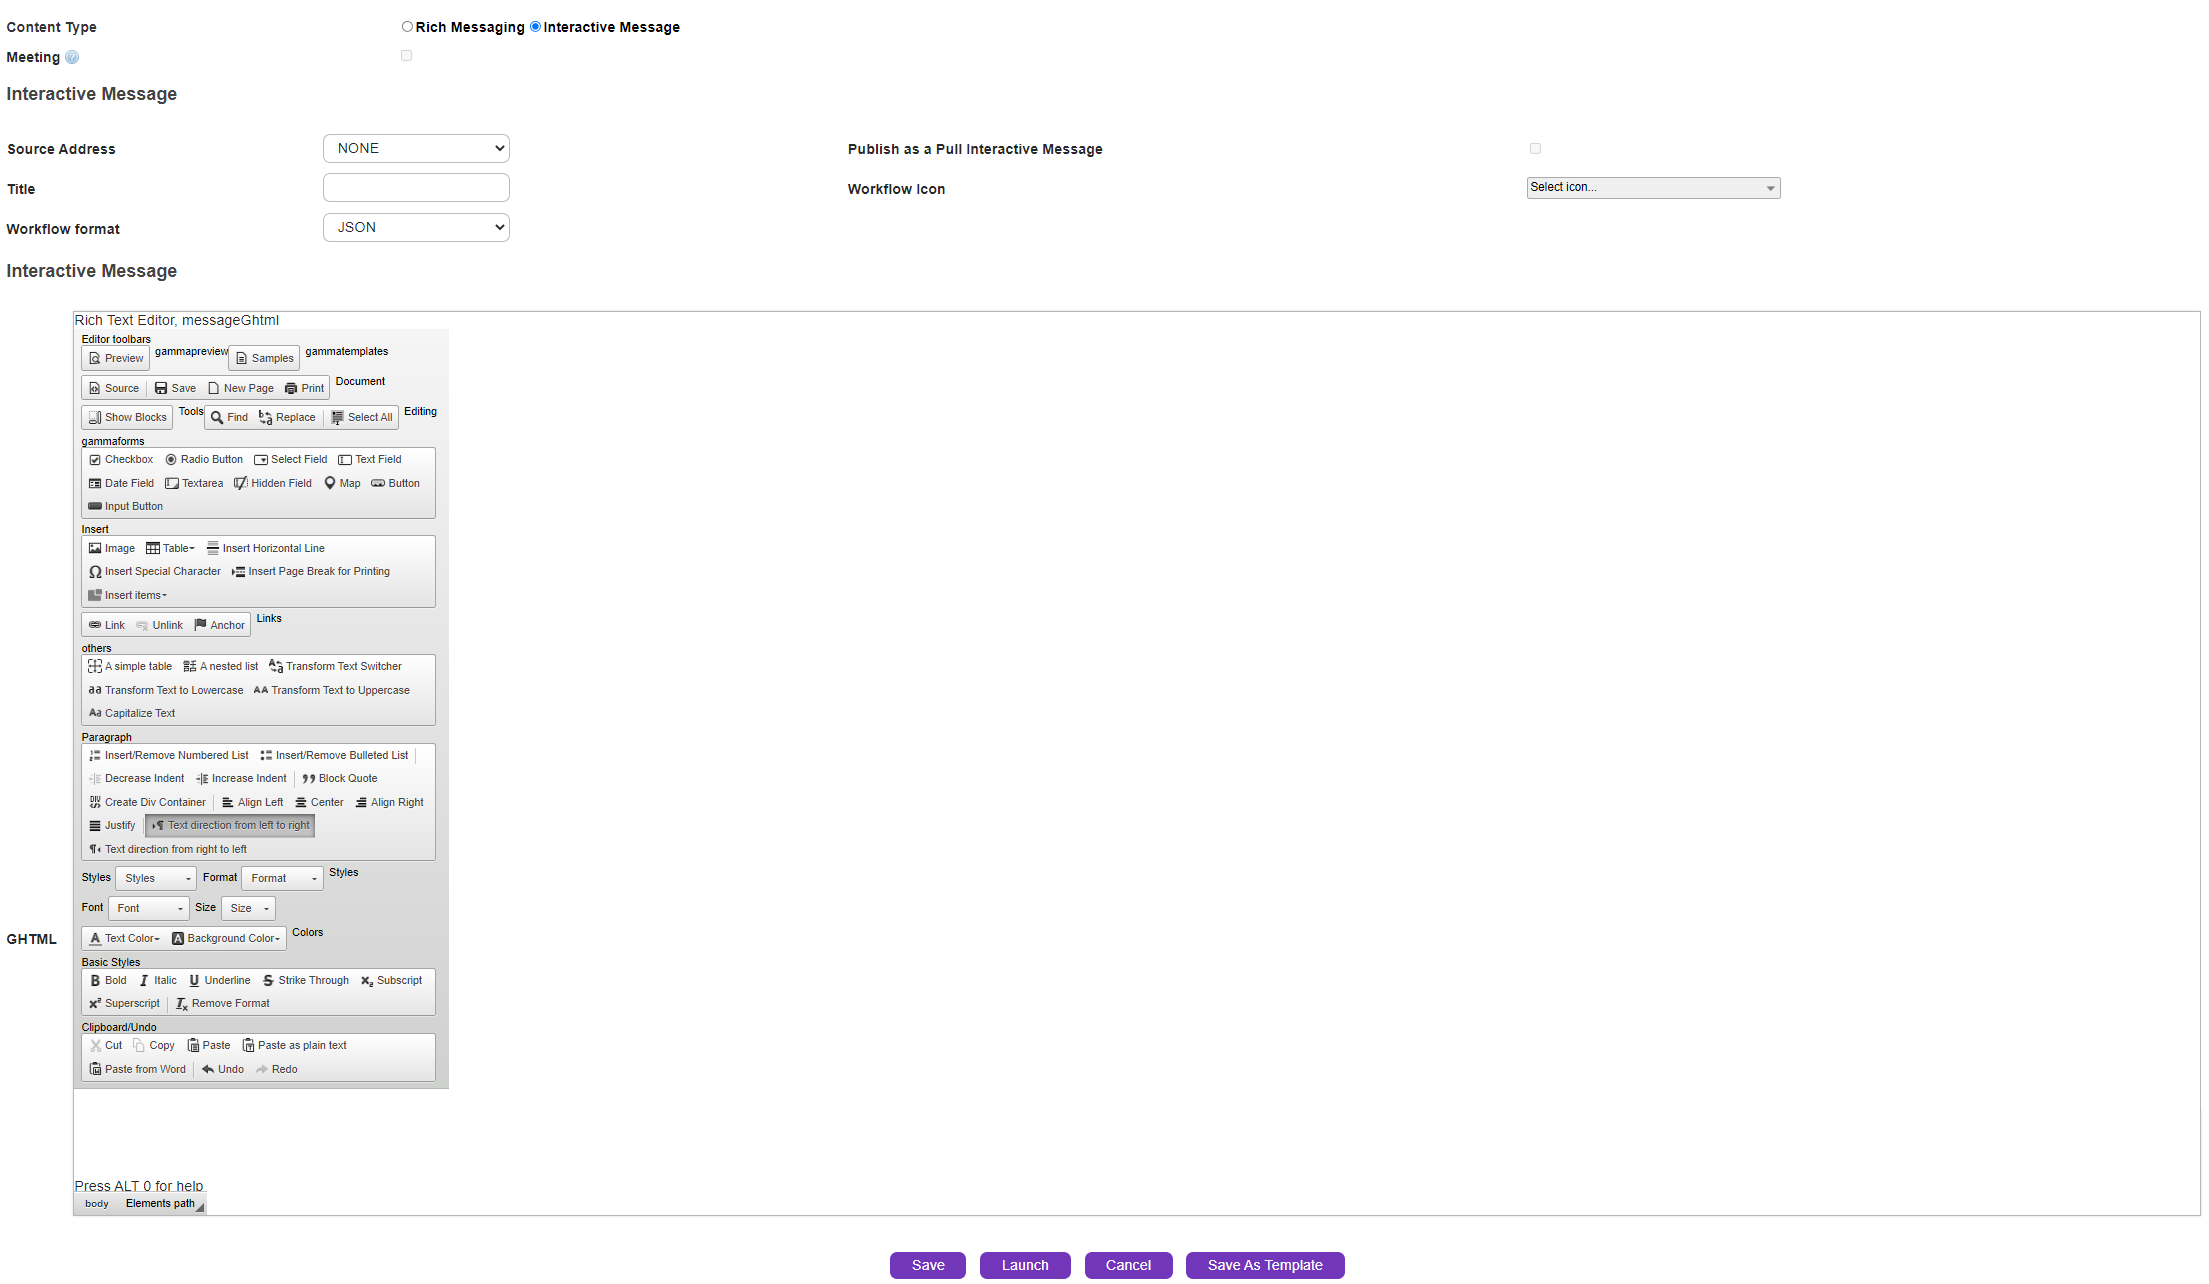
Select the Message Tab and select Interactive Message radio button as content-type. As soon as radio button is selected, Interactive Message and Interactive Message Content (i.e. the message editor) will be displayed, as shown below:
|
|
|
Interactive Message:
Source Address |
Selecting the Source address is mandatory if the user ticks the check-box for 'Publish a Pull Interactive Message'. Addresses appearing in the drop-down menu will be configured only by your platform administrator. If source address is not selected, the address will be picked up from the pool to send a workflow message.
|
Publish as Pull Interactive Message |
User needs to tick the check-box and save it as a template to make the interactive message appear in the 'Workflows' tab of GAMMA app. This allows you to create forms to be set up and stored, then be deployed by users and utilised when required. (e.g. - Leave Request Form). User will not be able to select the check-box if a source address is not assigned.
|
Title |
Name of the workflow message that appears in the GAMMA app.
|
Workflow Icon |
Drop-down list provides various icons to assign to the workflow. The icon will be displayed when the interactive message appears in the GAMMA app.
|
|
|
Workflow Format |
Allows user to choose the format for receiving responses - 'JSON' or 'Plain Text'. If the expected response may include an image, user must choose JSON as the workflow format. Once the user selects JSON, the attribute <gamma:format="application/json"> is added in the gamma header of the HTML source. You may verify this by clicking on 'Source' button in the HTML editor.
|
|
|
Interactive Message Content :
The message editor is where the workflows will be created. In the following section we've discussed the toolbars and how to get started with workflows: